


1、 Turn the valve manually, check that there are no abnormalities, and make the valve in the fully closed position.
2. Secure the bracket to the valve.
3. Place one end of the coupling over the valve arbor.
4. Drive the electric actuator to the fully closed position (the pointer is pointing to SHUT, zero opening degree scale), and insert the output shaft into the square hole of the coupling.
5. Fasten the connection bolts between the bracket and the electric actuator and valve body.
6. Use the handle to drive the actuator throughout the whole process, make sure the operation is smooth, without eccentricity and skewing, and check whether the valve can realize full closure and full opening in the demonstration range of the actuator's opening degree.
Note: Do not use excessive force, otherwise the actuator may be damaged due to over-travel.
Special note.
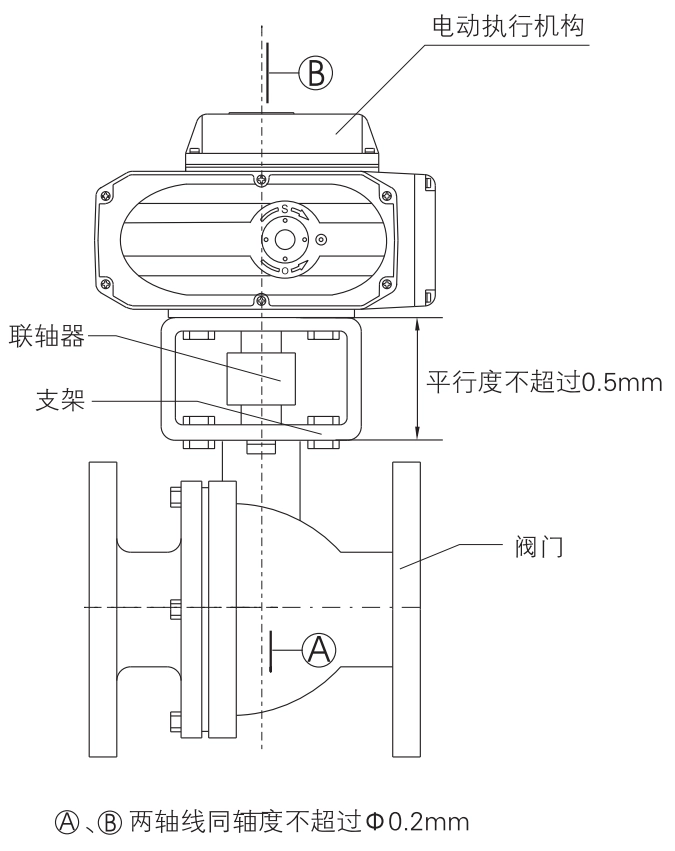
For users who provide their own brackets and couplings, please note:
- Brackets and couplings shall be designed and processed by the technical personnel of the specialized agencies and shall comply with the labeling requirements of the following figure.
- The machining of the shaft holes at both ends of the coupling should ensure the necessary accuracy and eliminate the transmission gap as much as possible, so as to avoid backlash in valve operation.
- The positional degree of the shaft holes at both ends of the coupling should be strictly guaranteed, otherwise it is possible to exceed the designed working range of the actuator, resulting in the valve not working properly because the actuator stroke cannot be adjusted.


 Egong.com.cn 42018502006527 No.