


Follow the wizard below to quickly set up the control module for DCL regulated electric actuators.
1、Correct wiring
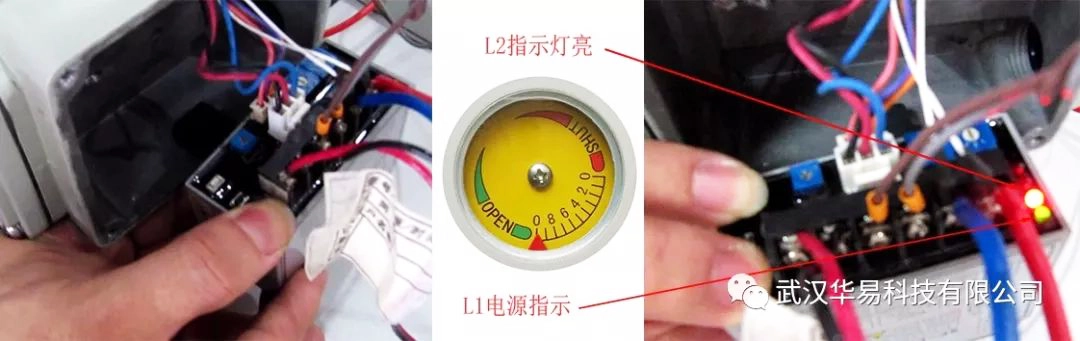
Correctly connect the power, input and output signal wires as shown in the figure below. Set the S-A selector knob to "2" (as shown below) and press the OPEN and SHUT keys to operate the actuator or spool/plate to the center position.
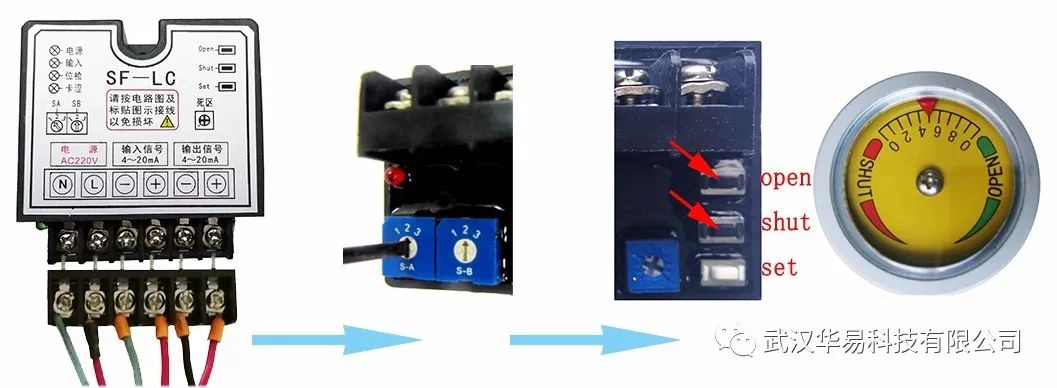
2、Stroke calibration
- Setting the full off position - press the shut (off) key, observe the actuator or spool/plate operation to full off, release the shut (off) key, and then press and hold the shut (off) and set (set) keys at the same time for about 2 to 4 seconds, when the L2 light is on, release the two keys at the same time, and then the L2 light goes out, and the shut-off position calibration is completed (when the deviation between the spool/plate and actuator dial indication is ≤30, the valve position shall prevail, and release the scale indicator disk, adjust to make the pointer consistent with the valve position). plate and the actuator dial indication deviation ≤ 30, the valve position shall prevail, and loosen the scale indicator disk, adjust to make the pointer consistent with the valve position).
- Setting full open position--Input accurate 20mA signal in the input terminal (Note: to ensure the accuracy of the full open position action and adjustment signal), press the open key, observe the actuator or spool/plate operation to full open, then release the open key, then press and hold the open and set keys at the same time for about 2 to 4 seconds, when the L2 lamp lights up, release the two keys at the same time, the L2 lamp goes out, the open position calibration is completed (when the deviation between the spool/plate and the actuator dial indication is ≤30, the open position will be completed with the valve dial indication). ~Then press and hold the open (open) and set (set) keys at the same time for about 2 to 4 seconds, when the L2 light is on, release the two keys at the same time, the L2 light is off, and the calibration of the open position is completed (when the deviation between the spool/plate and the actuator dial indication is ≤30, the valve position shall prevail and the actuator dial indication is loosened, and the adjustment is made so that the pointer is in line with the valve position).
3、Set the automatic state
Set the automatic state (as below). After adjusting the S-A selector knob to "1", input different signals in the range of 4-20mA with a hand manipulator to make the actuator run back and forth within 90 degrees, and observe the consistency between the input signals and the actuator indication/valve position opening.
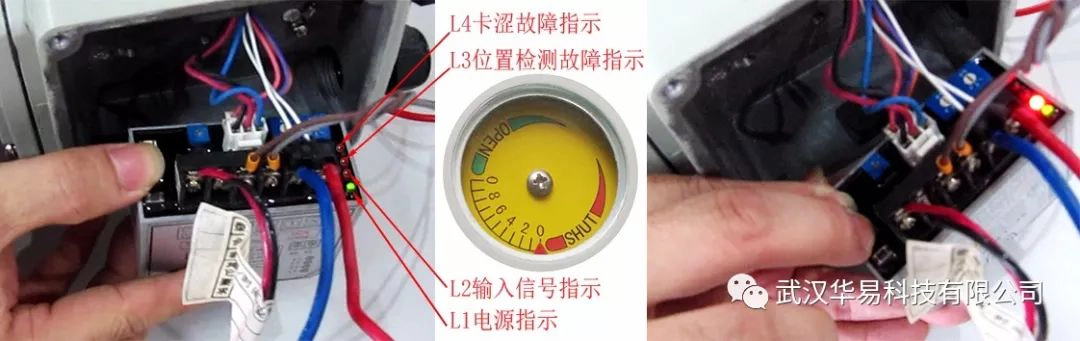
4、Potentiometer adjustment

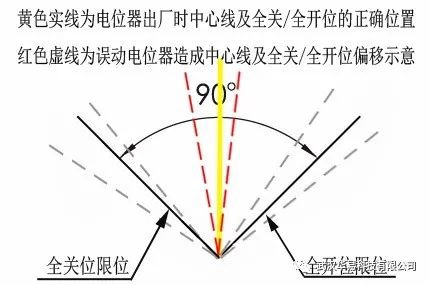
During commissioning of the E-module, if the potentiometer and its associated gears are moved by mistake, it will result in the full on/full off position being shifted (as shown in the figure below).
Adjustments can be made as follows (below):
- Use the handle to drive the actuator toward the center position so that the pointer is pointing at the 50% scale.
- Set the S-A selector knob to "2".
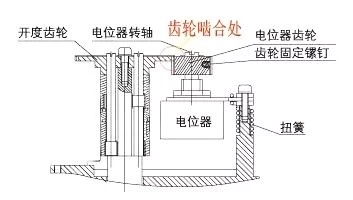
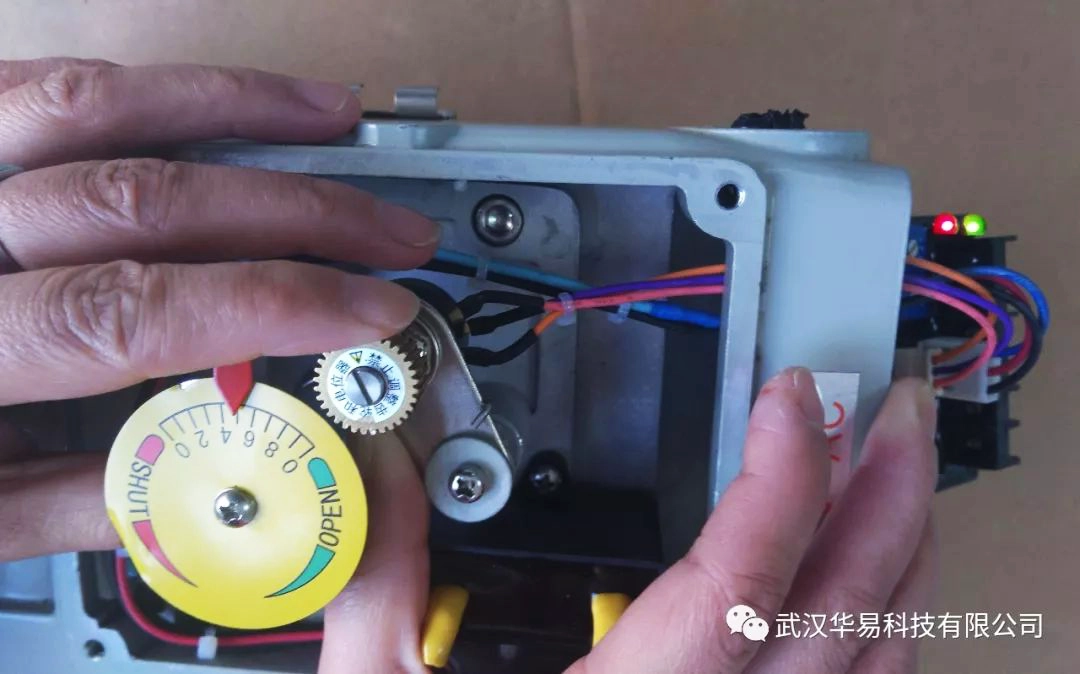
- Push the potentiometer by hand (overcoming the spring torque) to keep the potentiometer gear separate from the dial gear (as shown above).
- With the gears separated, turn the potentiometer slightly with your other hand so that the L3 red light is always on.
- Gently release the potentiometer back along with the spring torque to engage the potentiometer shaft with the dial gear.
- Set the S-A selector knob to "1". The potentiometer will be centered.
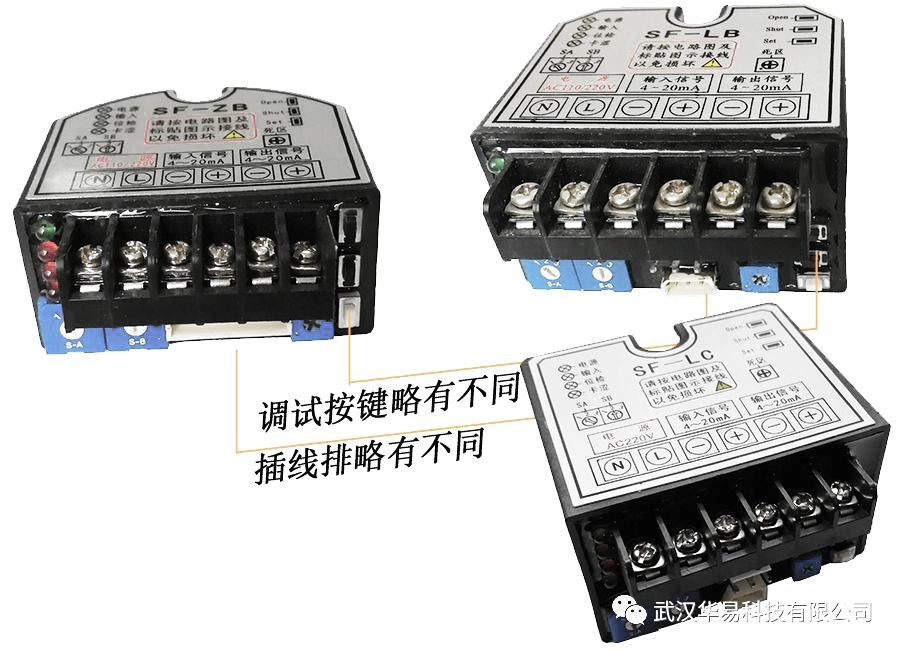
Note: SF-LB, SF-LC and SF-ZB modules are only slightly different in the plug-in row and debugging button position, their debugging steps and methods are the same.


 Egong.com.cn 42018502006527 No.